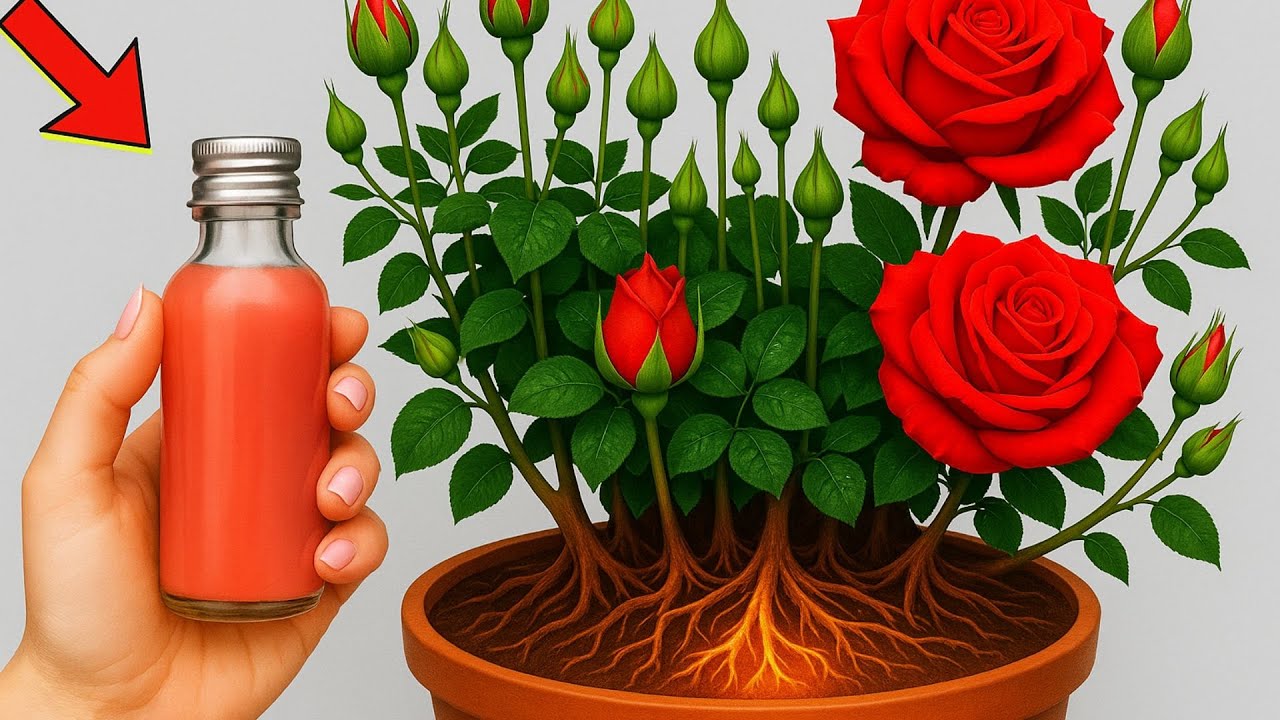
Root and Bloom Your Rose Branches Overnight with Just 1 Bottle!
Root and Bloom Your Rose Branches Overnight with Just 1 Bottle
Introduction
Have you ever admired the beauty of your neighbor’s rose garden, envying the vibrant blooms that seem to flourish effortlessly? You might have tried growing roses from seeds or even from established plants, only to be met with limited success. However, there’s a simpler method that can yield stunning results overnight, using just one common household item. Your rose garden could be transformed, so keep reading to discover how you can create lush blooms in your own backyard.
Materials Needed
Before diving into the process of rooting your rose branches, you’ll need a few essential materials. Gather the following:
- 1 clean bottle (such as a glass or plastic bottle)
- Several healthy rose cuttings (about 6 to 8 inches long)
- Water (enough to fill the bottle)
Having these materials ready will streamline your experience and ensure your success in propagating beautiful rose branches.
Step-by-Step Process
Now that you have your materials, follow this simple process to root and bloom your rose branches effectively:
- Prepare the Cuttings: Use clean, sharp scissors to take cuttings from healthy rose plants. Aim for sections that have plenty of leaves and avoid any that show signs of disease.
- Remove Excess Leaves: Trim any lower leaves from the cut stems, leaving just a few at the top. This helps the plant focus its energy on growing roots.
- Fill the Bottle: Pour water into the clean bottle, filling it about halfway. This water acts as a reservoir to nourish the cuttings.
- Place the Cuttings: Submerge the cut ends of the rose cuttings into the water. Make sure not to overcrowd the bottle; each cutting should have sufficient space to grow.
- Set in Sunlight: Position the bottle in a spot that receives indirect sunlight. This will help encourage growth without overwhelming the cuttings with direct heat.
- Check Water Levels: Monitor your cuttings regularly and top off the water as needed, ensuring the cut ends remain submerged.
Following these steps will foster a healthy environment for your rose cuttings to thrive.
Common Mistakes
Even seasoned gardeners can make mistakes when propagating rose cuttings. Avoid these common pitfalls:
- Using Dull Scissors: Always use sharp scissors for clean cuts to prevent plant stress.
- Overwatering: Ensure that the cuttings are not sitting in constant water; this leads to rot.
- Neglecting Light: Avoid placing the cuttings in harsh direct sunlight, which can hinder their growth.
- Ignoring Air Circulation: Ensure your setup has good airflow to prevent mold and decay.
Avoiding these mistakes will help you successfully root and bloom your rose cuttings.
FAQ
How long does it take for rose cuttings to root? Typically, rose cuttings can start developing roots within two to three weeks, depending on conditions.
Can I use other materials for propagation? While this guide focuses on using a bottle, you can also use soil or garden beds for planting once roots are established.
What type of roses works best for cuttings? Most roses can be propagated through cuttings; hybrid tea and floribunda varieties generally perform well.
Conclusion
By utilizing this straightforward method, you’ll encourage stunning blooms in your rose garden in no time. What types of roses are you hoping to grow? Share your thoughts in the comments!