Boil Yarn Like Grandma: 5 Easy Steps to Transform Your Crafting!
Boil Yarn Like Grandma: 5 Easy Steps to Transform Your Crafting
- Introduction
- Easy Steps for Boiling Yarn
- Benefits of Boiling Yarn
- Common Mistakes to Avoid
- FAQ
- Conclusion
Introduction
Many crafters find themselves in need of techniques to restore their yarn’s luster or alter its texture. Perhaps your yarn has lost some of its vibrancy, or it simply doesn’t feel as fresh as when you first purchased it. You might have heard whispers of an old method that involves boiling yarn, a practice passed down through generations. By the end of this guide, you’ll be equipped with practical steps to easily transform your yarn, so keep reading to discover how you can refresh your crafting supplies.
Easy Steps for Boiling Yarn
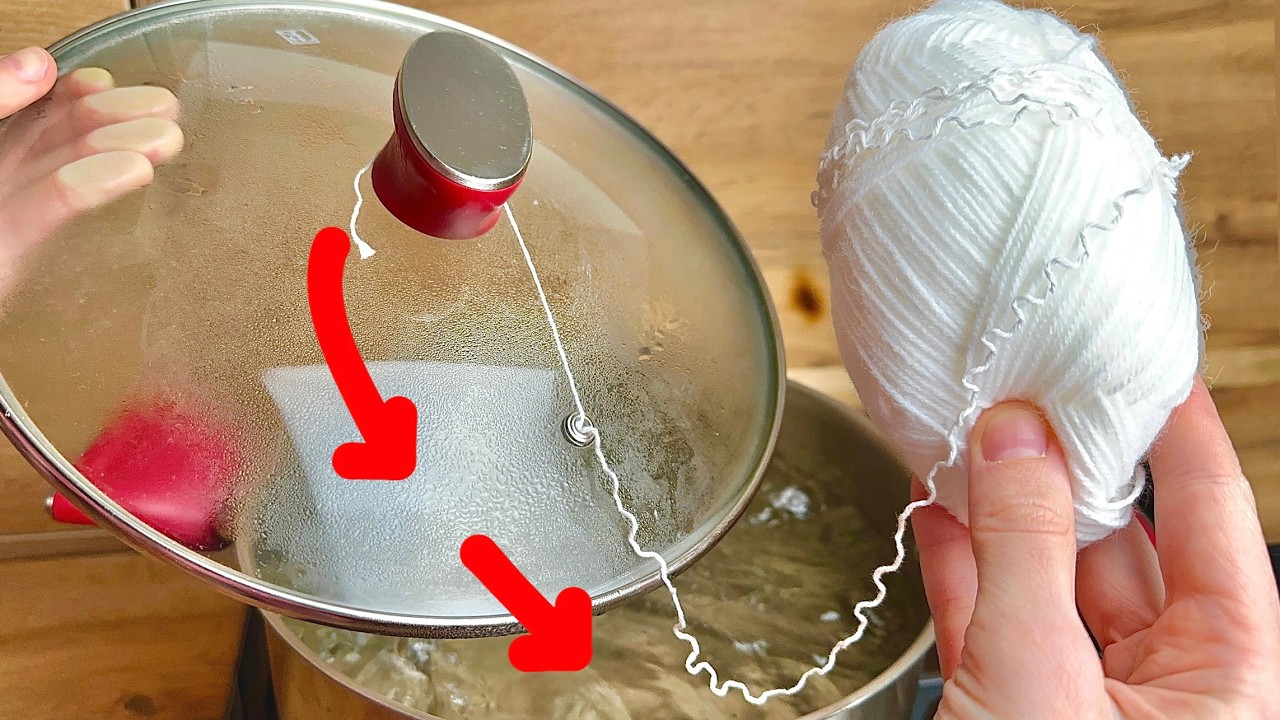
Boiling yarn can rejuvenate its colors and fibers. Let’s walk through this process together with these straightforward steps:
- Gather your materials: you’ll need a pot, water, a stove, and your yarn.
- Fill the pot with enough water to submerge the yarn completely.
- Heat the water until it reaches a gentle boil; avoid a rolling boil as it can damage some fibers.
- Add your yarn to the boiling water, ensuring it is fully immersed. Consider adding a bit of vinegar to enhance the color.
- Simmer for 15-20 minutes, stirring occasionally. This helps the fibers absorb the moisture evenly.
Materials Needed
Before beginning this method, ensure you have:
- A pot that is large enough for the yarn
- Fresh water
- Optional: vinegar, fabric softener, or specific dye for enhanced results
Practical Tips
To make the most of boiling your yarn:
- Use a timer to avoid overcooking.
- Monitor the water level, adding more if it evaporates too quickly.
- Consider wearing gloves to protect your hands when working with boiling water.
Benefits of Boiling Yarn
Boiling yarn has several benefits that can greatly enhance your crafting experience:
Restore Vibrancy
Boiling your yarn can bring back its color intensity, making it look as good as new. This is particularly effective for vibrant shades that may have dulled over time.
Improve Texture
The process also helps to relax the fibers, making them softer and easier to work with. If your yarn feels stiff, boiling can bring back its pliability.
Eliminate Odors
If your yarn has picked up unwanted smells, boiling it can effectively eliminate those odors, allowing for a more pleasant crafting experience.
Common Mistakes to Avoid
While boiling yarn is a simple task, a few common mistakes can lead to unsatisfactory results:
- Skipping the vinegar: If you are using a dyeable yarn, avoiding vinegar can lead to less vibrant results.
- Overcooking the yarn: Leaving it in boiling water for too long can damage the fibers.
- Not stirring: Failing to stir your yarn can cause uneven boiling, leading to patchy results.
- Using hard water: If your tap water is hard, it could leave residues. Consider using filtered water instead.
- Ignoring the fiber content: Different fibers react differently to heat. Always check if your yarn can withstand boiling.
FAQ
Can all types of yarn be boiled? Not all yarns are suitable for boiling. Check the fiber content; wool and cotton usually respond well, while some synthetic fibers may not.
How long should I boil my yarn? Generally, simmering for 15-20 minutes is enough, but this can depend on the yarn type and desired effect.
Can I add colors or scents when boiling yarn? Yes, adding a bit of vinegar or fabric softener can enhance colors and scents during the process.
Conclusion
Boiling yarn is a practical technique that can refresh and restore your crafting supplies. With just a few simple steps and a little patience, you can improve your yarn’s colors and texture significantly. What experiences have you had with yarn care? Feel free to share your stories in the comments below!